Please use the following search box to quickly locate valuable FAQ support guide.
You can use key words or full statement to search by. Alternatively you can simply browse by Category belowBefore updating to latest version of EzSeries Suite, there are a few things that you will want your IT consultant to do first. Please ensure this process is handled by a certified IT consultant to handle all aspects of the upgrade process, due to the nature of the process handling PHI and HIPAA guidelines only Certified IT consultants will be supported.
IT consultants please follow these guides to ensure proper upgrade occurs and all data is retained as required by HIPAA. Vatech Support will require IT to be involved in order to support Server side installation or updating of the EzSeries Software due to data retention requirements in the event of an error occurs.
Failing to follow the update process or using incorrect versions may insure loss of data or incompatibility, please be sure to review all the guide before proceeding.
A.) Download Installation Files:
Select the EzSeries Package installer; as outlined by the most recent version under Section 1 for new installations/updating or previous versions based on your specific version requirements. You can also click the 'Download All' to start the entire download package vs selecting each individual file.
In order to ensure you are updating and installing the proper versions, use the following break down to determine the proper version combinations to use.
New Version support list: Must update all software to matching versions as follows or newer* on Server Location (Where database is installed), Capture PC, and All Workstations.
1.) EzSeries 6.2.3 - V3.5.3 Installation Package
Download: EzSeries EzDent-i Installation Files
- To download all; Choose the correct version as outlined in the most recent version.
- Click the Download Arrow as shown to download all core installation files. Example:

File manager Use Port: 43112
Note: Must reboot after upgrading or installing this version.
2.) Implant Library Downlaod:
Download Implant Library Version to match your
3.) Before updating to latest version suite, the site must be on EzSeries Version 5.5.3 or newer*, please verify compatibilty before updating*.
Please run EzServer Installation or updates on Local ADMIN account with full permissions.
You can locate the current version you are on by looking at "Add or Remove Programs" or from control panel "Uninstall A Program", look for 'EzServer' in the list and it will be noted the version currently installed.IF the site is not currently on at least EzSeries Version 5.3 or newer please follow the Previous Version Update Guide
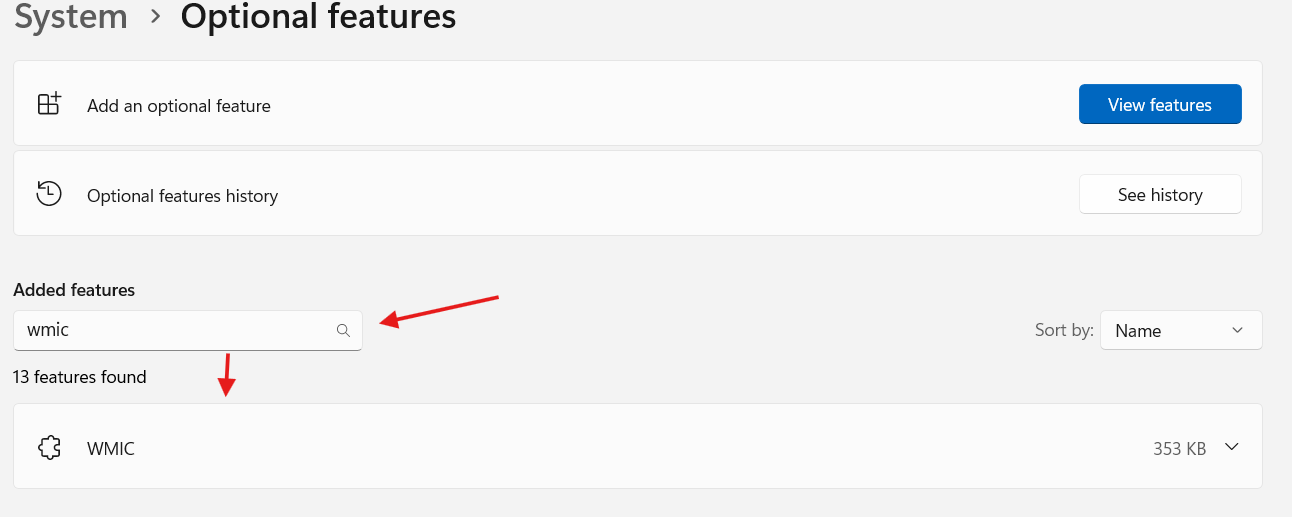
4.) Ensure WMIC is installed
- Ensure WMIC is installed in windows, by opening 'Optional Features
- Search 'WMIC' , if installed WMIC will appear in the features found.
- If not installed; please install as normal Installing WMIC Guide
5.) Ensure that any higher version PostGres higher than 9.2 is stopped before installing (If present)
- Postgres 9.2 should remain running*
- Any Postgres Higher than PostGres9.2 if present should be stopped before installation.
- I.T. Should verify if Version 15 is installed already or not before proceeding installation. If the version is in installed by another company software please verify with the 3rd party before installing.
6.) Port Exclusions Information :
Important Notice: Its is highly recommended to deploy the following IT Antivirus and Firewall Port setting exclusions:
A.) Firewall Programs and Port Numbers
B.) Antivirus Exclusions
B. Backing up the database.
Before updating EzServer, IT MUST BACKUP the database by following the Backup Documentation Guide located here, as It is required that a full and complete backup is made and confirmed before proceeding.
C. Software Updating & Installation:
All can be ran as update over the top of existing version by Clinical IT. No additional support is normally required however - Vatech America can assist with updating EzServer and Capture PC; however Clinic IT will be required to ensure working backup is in place before updating and also assisting with updating Workstations.
In some limited cases EzDent-i and Ez3D-i might prompt to uninstall too old of a version before installing the new version. Simply use add/remove programs to uninstall the program first before updating (This excludes EzServer)
1.) Installing EzServer: Installing EzServer 6 Series for new users having no existing Database.
Notice: It is important to note that EzServer uses PostGres SQL database and SHOULD NOT be installed on a PC/Server using another instance or version of PostGres as outlined in the EzServer manuals.
To update the EzServer after the required backup is completed;
Pro Tip:
If you need to update the storage file path (Post installation) to where you would like to move the data file path, please follow this guide:
2.) Updating/Installing EzDent-i -Normal 2D/3D & IOX Users
To update the EzDenti on the Capture PC* and Workstations*:
Once installation is finished please follow the prompts for registration and activation in Section D/E.
3.) Updating/Installing Ez3D-i - Normal 3D Users
To Install or update the Ez3Di on the Capture PC* and Workstations*:
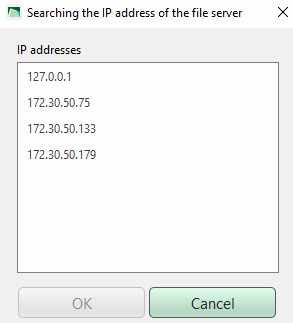
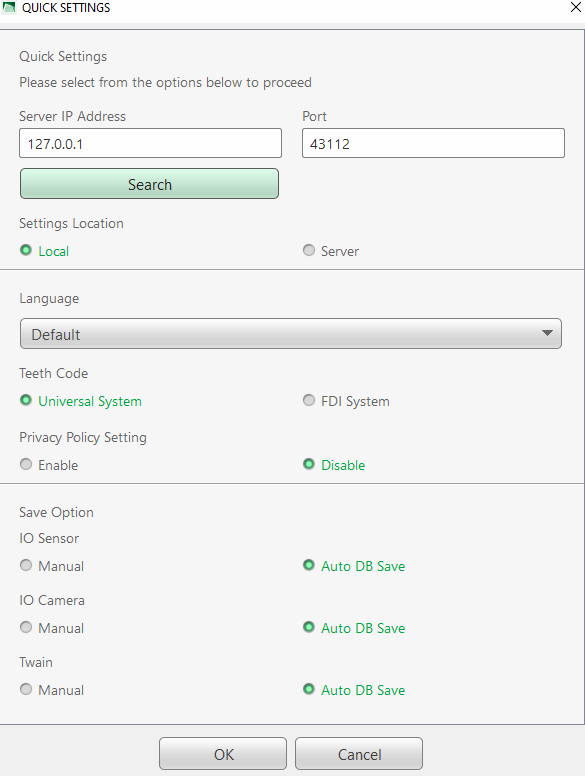
D. Connecting to the server
When installing EzDent-i and Ez3D-i for the first time on each PC* you will be prompted to select the quick settings as shown below. This will occur on every new PC.
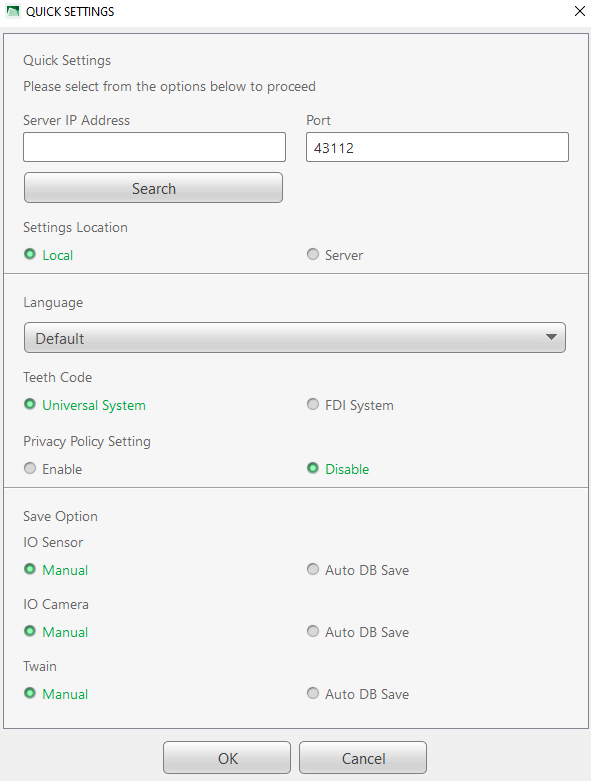
Selecting the Database Location:
Additional Settings:
E. Ezseries Activation process:
Activation of Static or Floating License for EzSeries:
For New installations using Static License: