Please use the following search box to quickly locate valuable FAQ support guide.
You can use key words or full statement to search by. Alternatively you can simply browse by Category belowPreparing to Burn:
Vatech Recommends using DVD-R or USB 4GB (Or Larger)
There are 2 main options either CD/DVD which burns the scan and viewer software to a CD/DVD disk or you can save the image directly to a USB Drive sometimes referred to as a "Flash Drive" or "Memory Stick". Burning to local disk also is an option for certain FTP services or websites where availilbe.
In either case once you decide which media you will use either CD/DVD or USB ensure the CD/DVD is inserted into the CD/DVD Drive before starting the process.
If you decide to burn to a USB Drive make sure the USB Disk is connected to the PC before starting the process.
Open the Patient Image and prepare to burn
In preperation of burning or Exporting 3D Dicom using Ez3Di to CD/DVD or USB/Local Disk, you will first want to open the 3D Volume you wish to burn. Simply follow the normal proceedure to open the patient chart in EzDent-i and launch the image you wisht to burn using the normal proceedure for viewing the image.
Versions 5.2.6.1 and Newer.
In the menu across the top, click the CD Icon for the export & burning function.

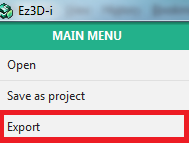
Older Versions:
Click Menu by clicking the black or Green colored menu button as shown below and choose the "Export" button as shown below.
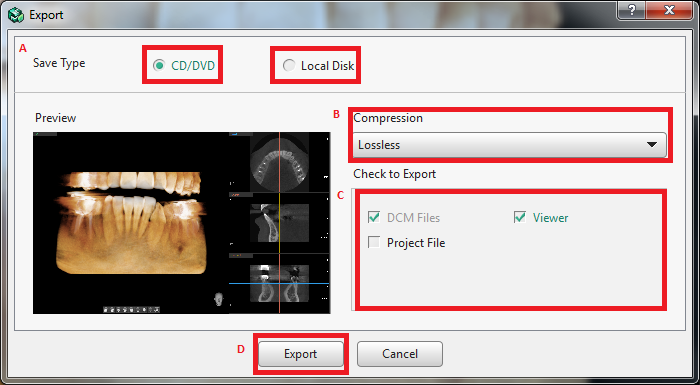
Choosing Export Options:
At this point the export options menu will appear where you will select all the options you wish.
Step A. choose rather to export via CD/DVD or Local Disk;
Step B. Compression Should remain at default "Lossless"
Step C. Verify the selection of DCM Files and Viewer are selected; all other options are optional.
Step D. Hit the Export button.
For CD/DVD Burning Process:
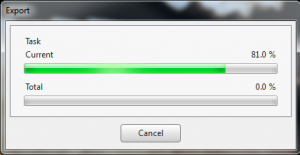
IF you selected the CD/DVD option in Step A previously, Once you have selected Export wait a moment while the process begins.
Note: During this process if you get a memory size error then your selected CD/DVD or USB is too small.
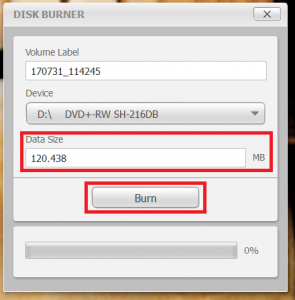
Once finished Disk Burner program will now launch; data size will be shown of the files to be burnt.
Click "Burn" to start the burning process.
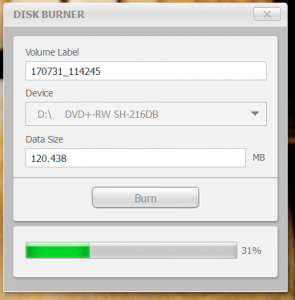
You will get a progress bar as shown below; when finished the CD/DVD will eject.
For USB/Local Disk Process
IF you selected the Local Disk option in Step A previously, a browse window will appear in which you will want to select the location to save the image too. Typically you will search for the Drive letter directly as shown below in this example we are using USB Drive (E.)
Simply Select the desired Drive (or Folder if saving locally) as shown in Step A.
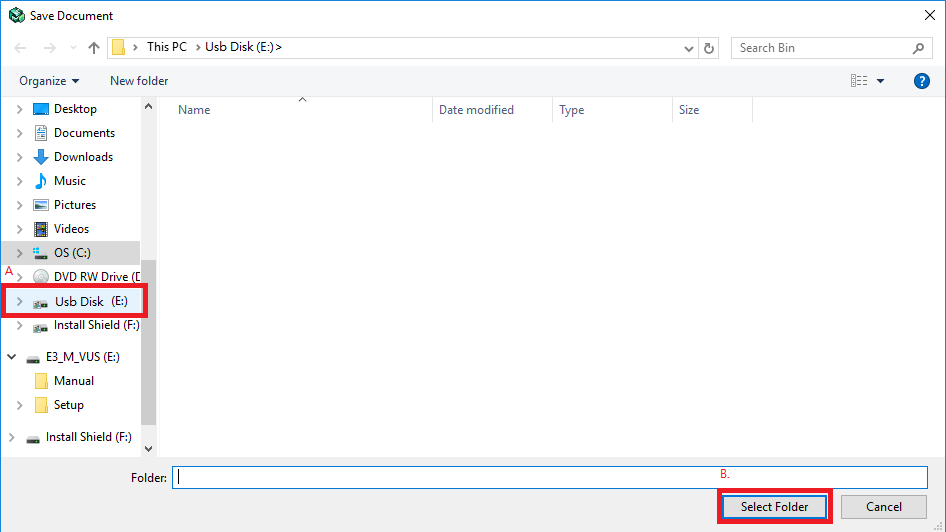
Click the "Select Folder" button as shown step b. the export will then automatically save the image and viewer to the selected location.
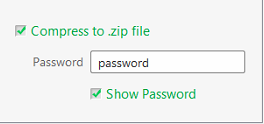
Zipping with password protection
You may also export the CT scan and compress it into a zip file directly from EzDent-I
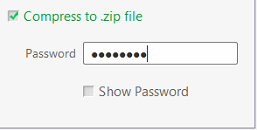
By clicking on Show Password, it will simply reveal your intended password for your verification.