Please use the following search box to quickly locate valuable FAQ support guide.
You can use key words or full statement to search by. Alternatively you can simply browse by Category belowIt is highly recommended that this guide be used only by qualified IT Consultants to move or merge EZDent-i database in accordance with HIPAA retention regulations.
All proper backups must be made in advance of conversion process. Vatech America holds no liabilty in the event of failure to follow recomendations or proper adhearence to conversion process steps.
Once a working back up is confirmed, Continue on.
Pre-Migration:Things to check first:
Determine the desired conversion or migration for EZServer:
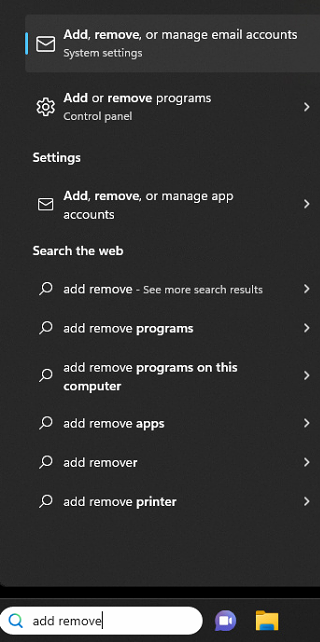
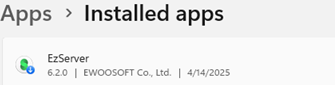
To Determine the version of EZServer:
You can locate the version of EzServer by using the installation version shown in 'Add or remove programs' located in the control pannel of the *TARGET* PC.
EzServer Version In Use: VTMigration Tool To use:
Version 5.3.0 and Up EzServer 6.0 Migration Tool Ver. 1.0.0.4
Pro TIp:
*DO NOT use this verseion for any EzServer Version previous to 6.0
Downloading Migration tool:
Migration tool can be found in the following link:
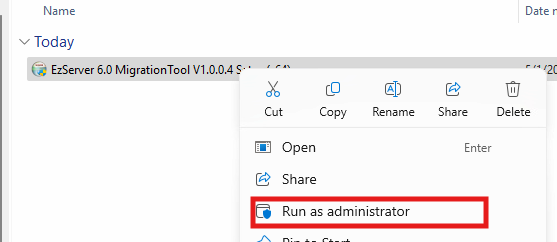
Installation of Migration tool:
Right Click and Run As Administrator - the EzServer 6.0 Migration Tool as downloaded in step 1.
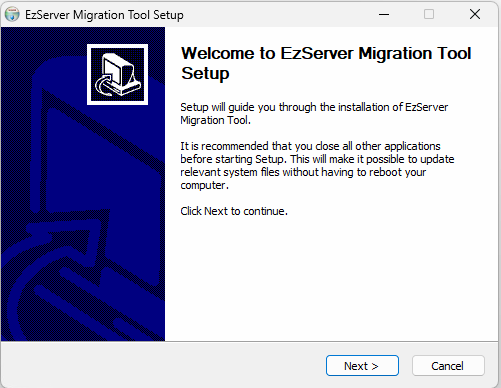
Click Next
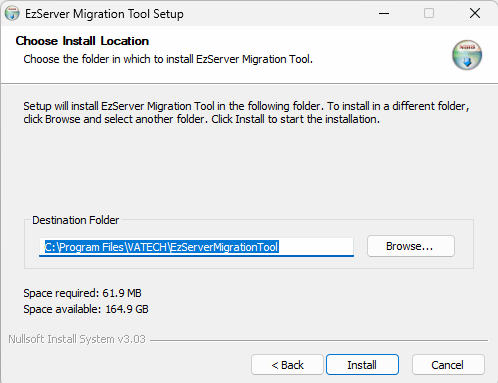
Click Install - Keeping the default installation: C:\Program Files\Vatech\EzServerMigrationTool\
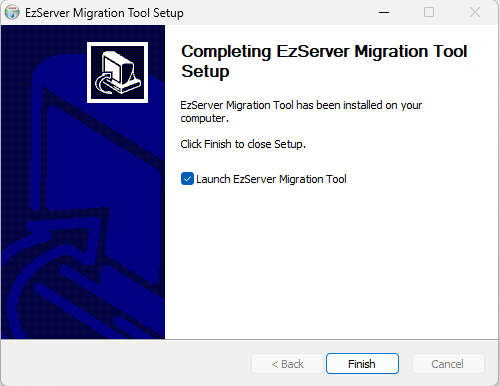
Once installation is completed, click Finish and the migration tool will run automatically as shown:
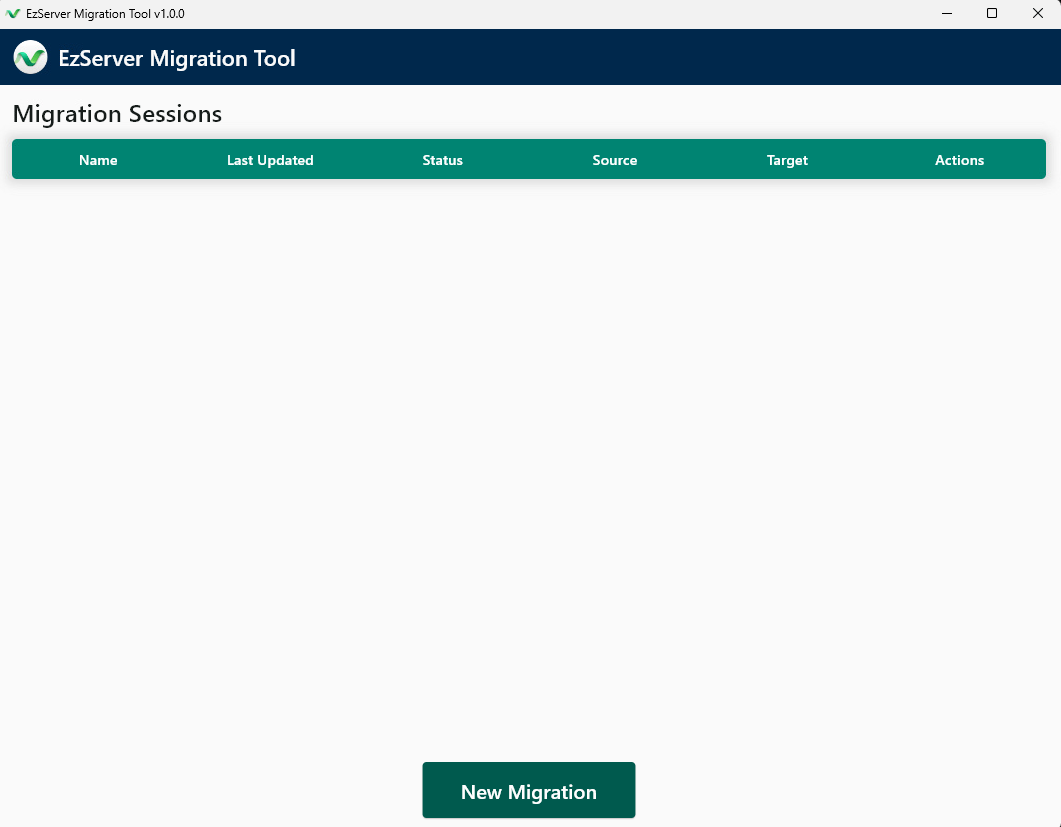
To start the migration you will need to press New Migration
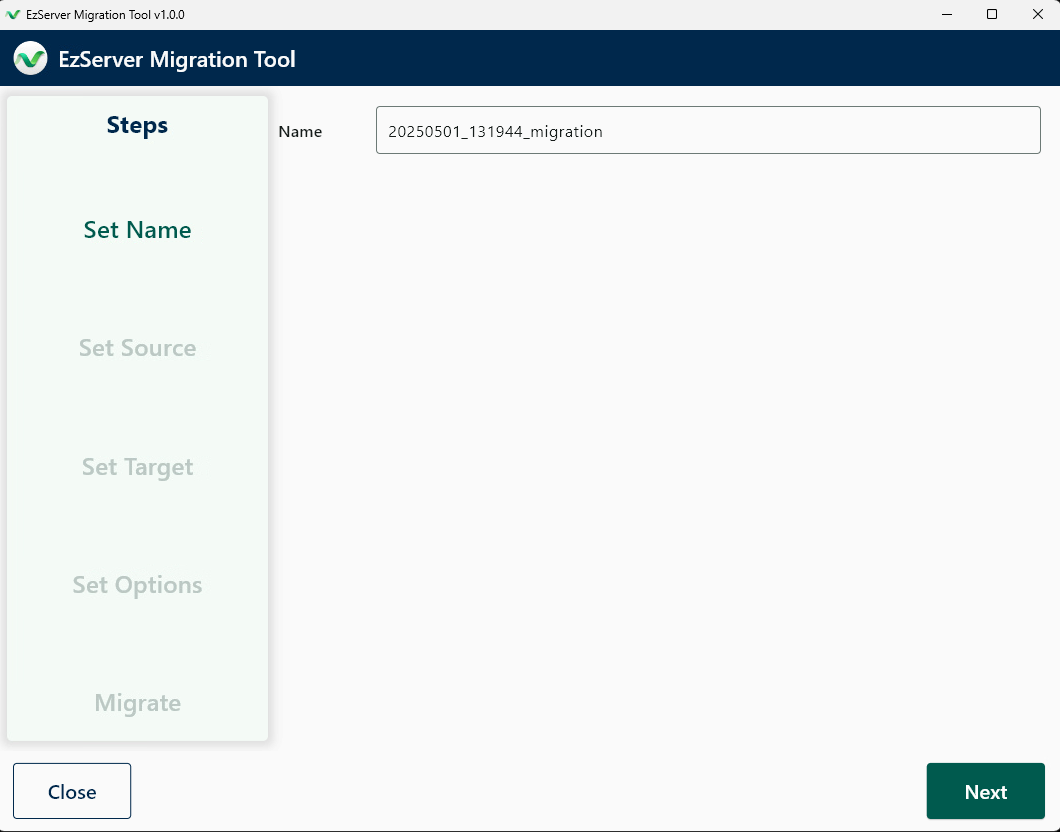
Set Name: Give the Migration a Name - Typically it will auto fill a generic name, click Next
Set Source:
A. EzServer v5.3.0 or Higher (Local)
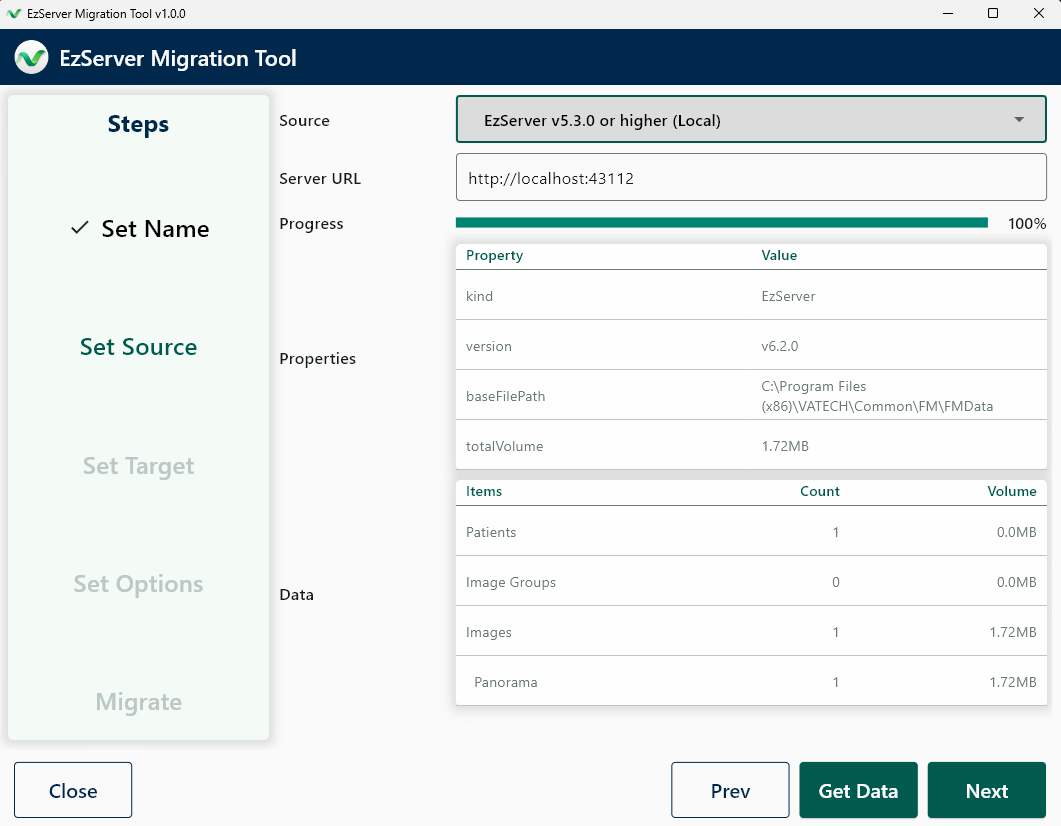
B. Click Get Data
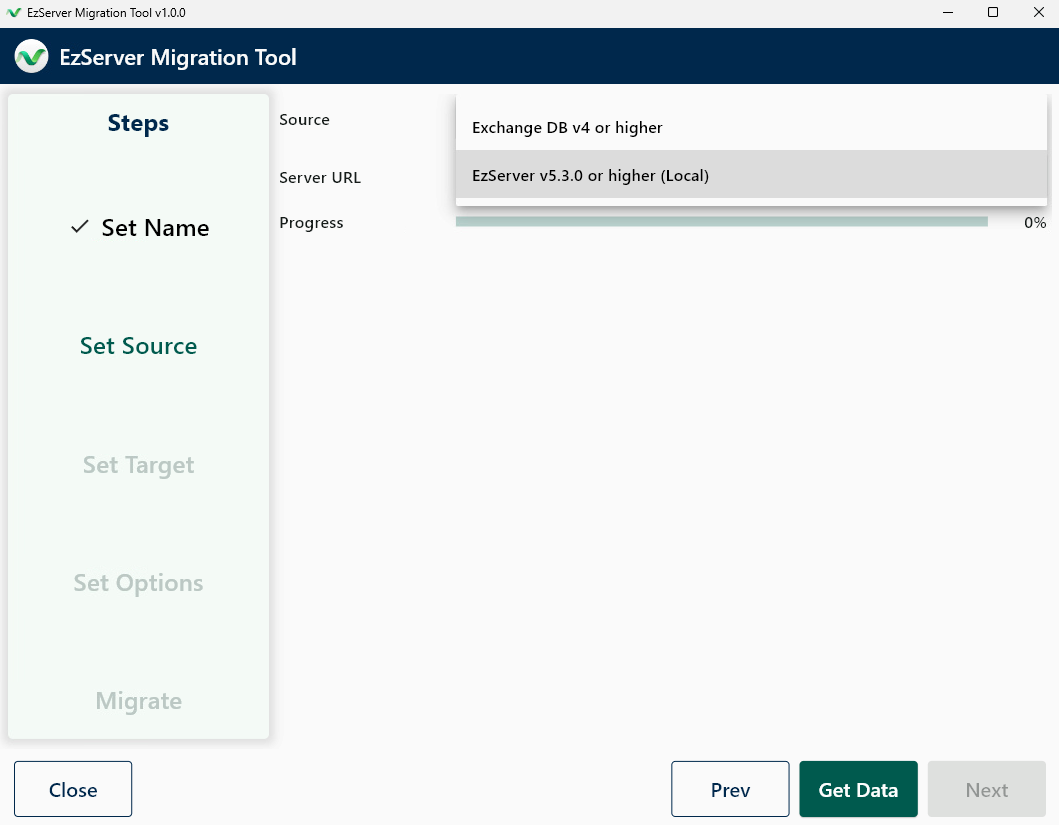
Once the data is loaded; click Next
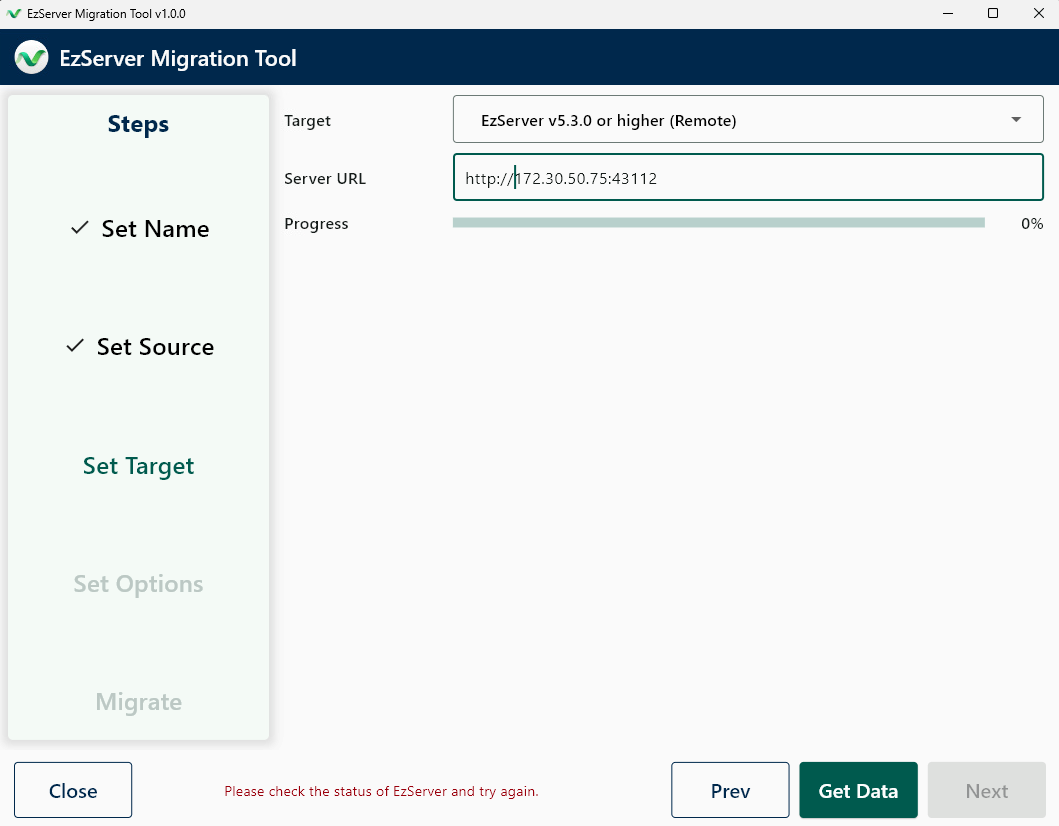
Set Target:
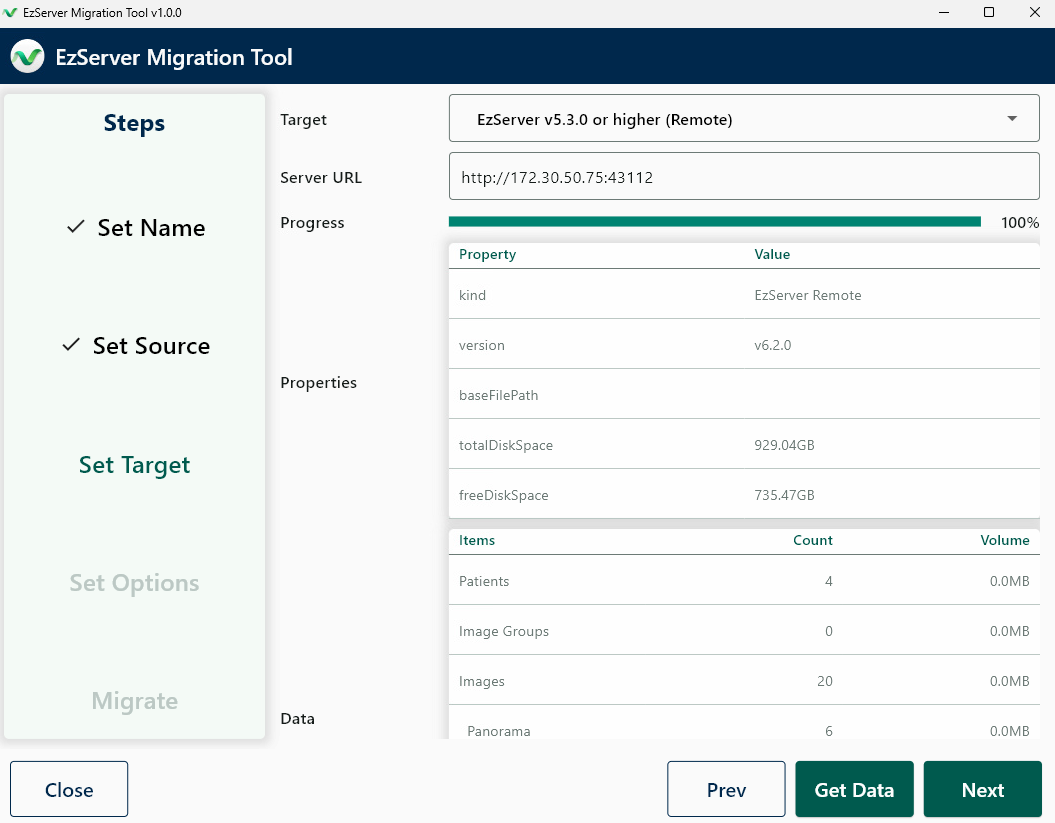
You will insert the IP of the Target Server URL followed by the Port: In this example the Target IP is 172.30.50.75 so we enter in the Server URL : http://172.30.50.75:43112 then click Get Data
Once the Target data is loaded; click Next
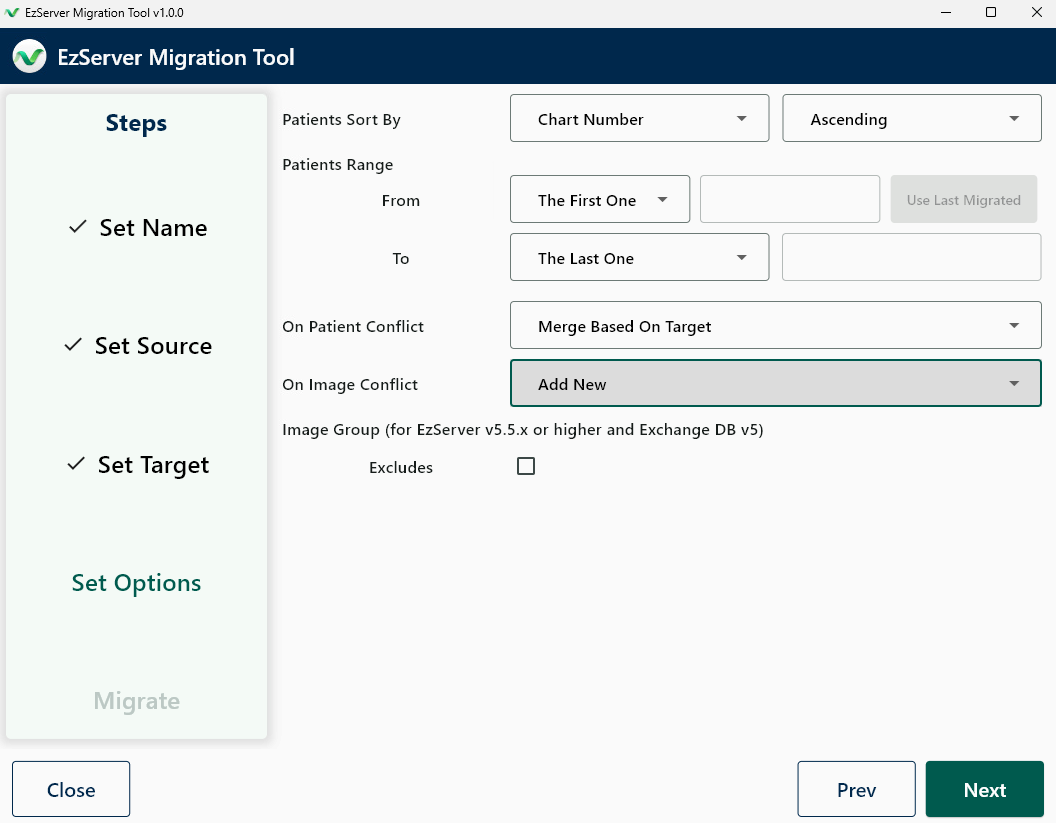
Set Options:
Leave all Options as defaulted, and click Next:
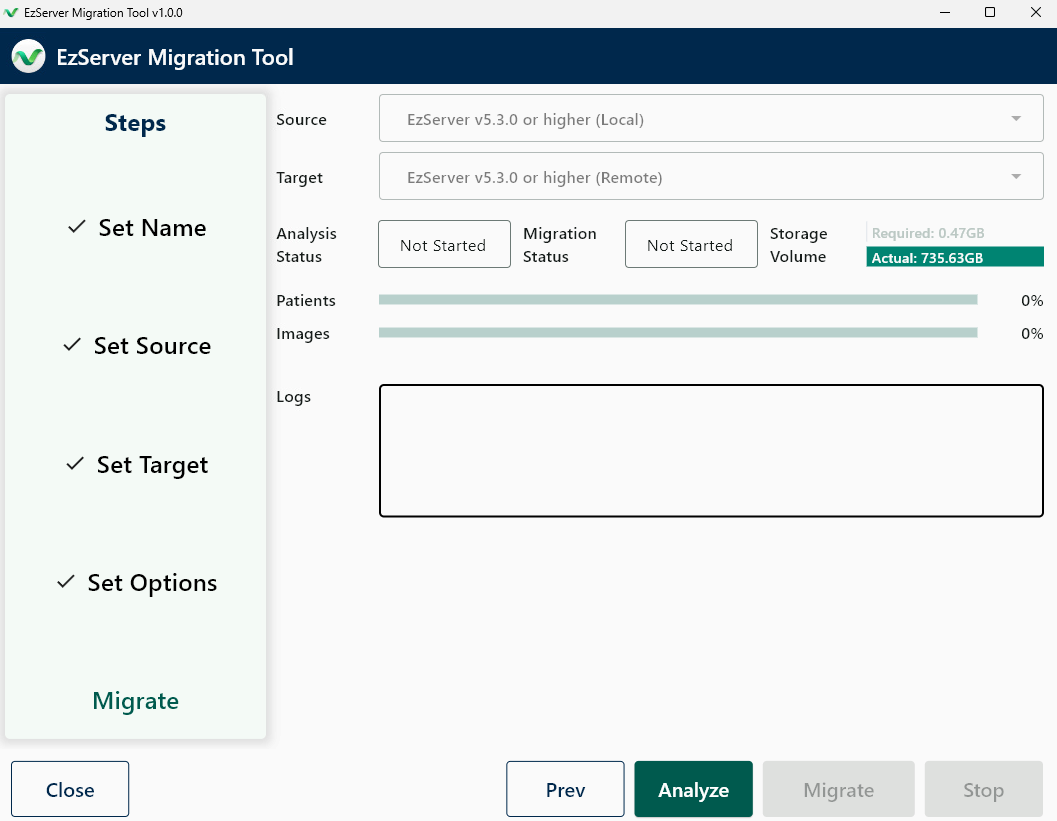
Migrate: Analyze
Click Analyze to start the analyze process
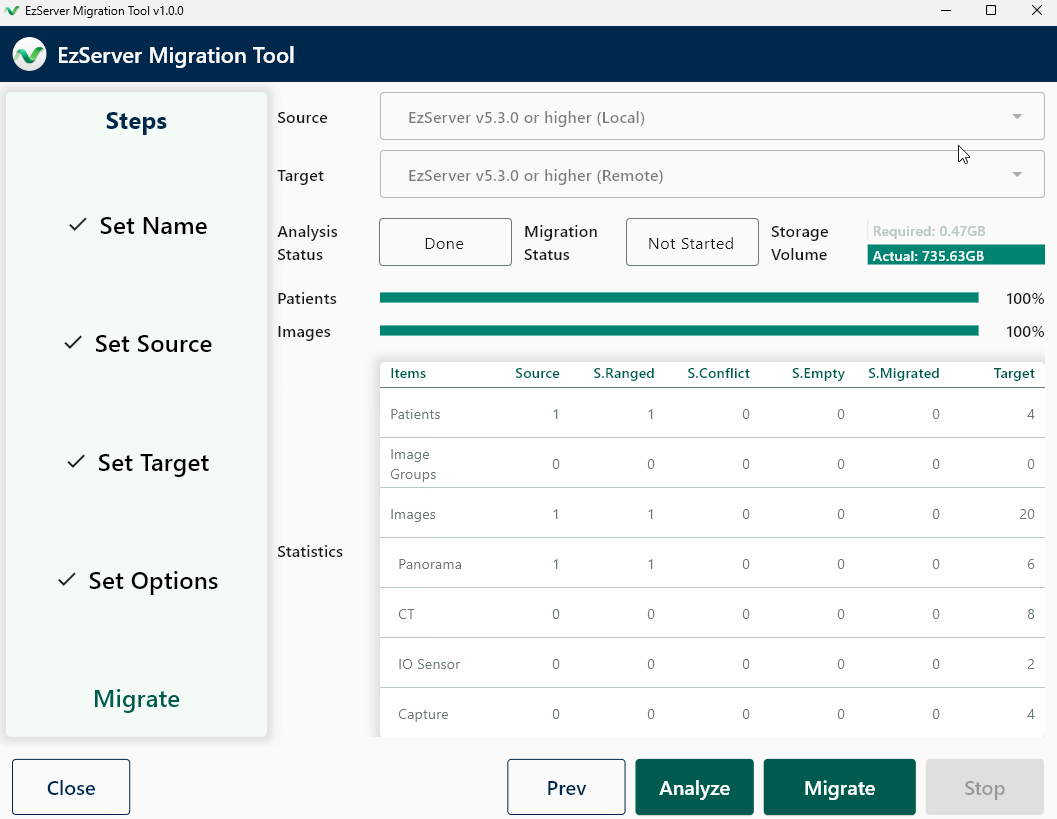
Migrate:
Once the Anlayze function is finished, click the Migrate
The migration will start and show the progress as it progresses
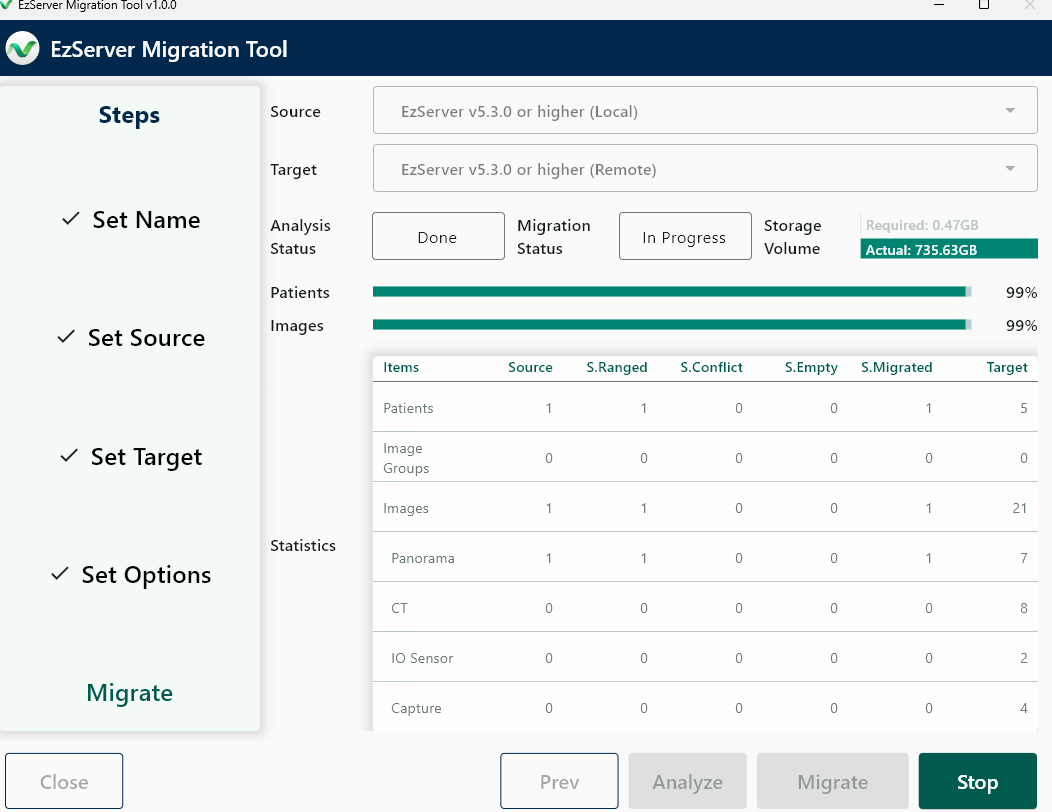
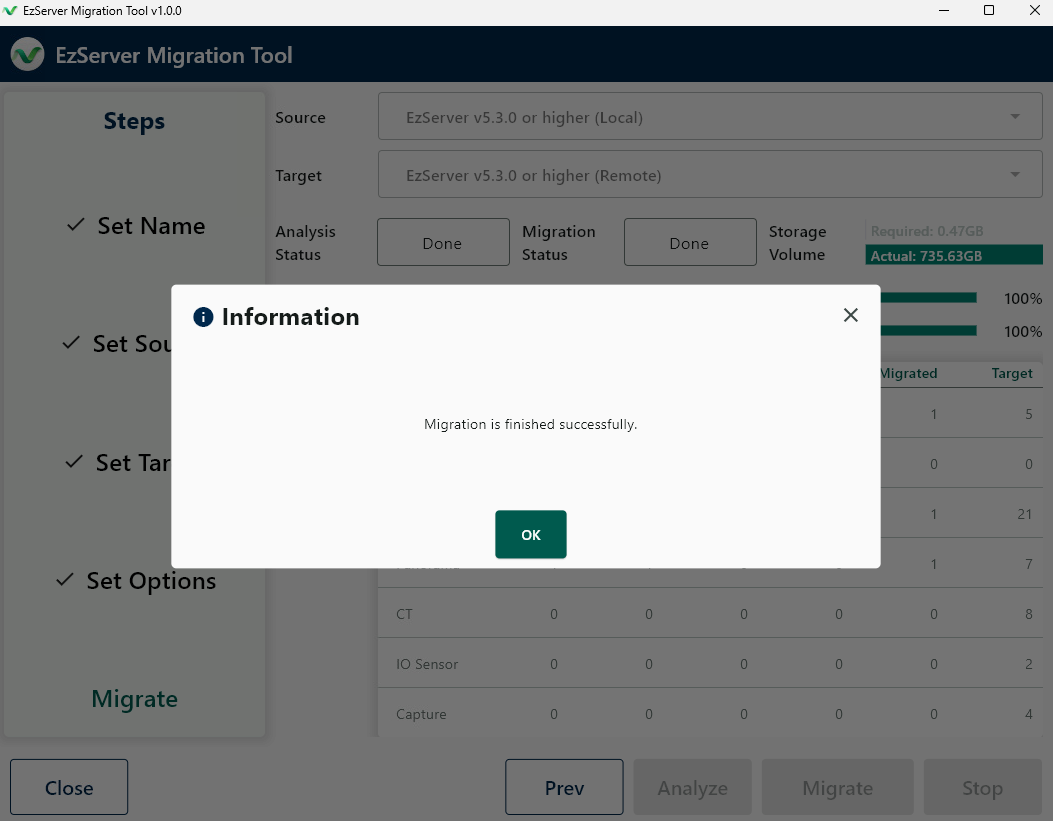
Once the migration is finished you will be prompted and click OK
The final step you will need to configure EzDent-i & Ez3D-i (if in use) to point to the new server location. In order to point the software to the new loaction,
please follow the following guide:
How to Configure EzSeries Configuration